Hot Runner Cable Testing – So Much Easier!
The first thing to check for is the continuity of each zone. You’ll need to know the wiring diagram of the connectors. You then touch one of the ohmmeters leading to the male pin or female connection, and the other lead to the related zone on the other end of the cable. You’ll then do this for each of the remaining zones. If you’re by yourself without a vise and workbench, it’s not so much fun. You’ll typically see people fold the cable over so each connector at the end of the cable is next to the other, enabling you to make contact with each zone.
What About Shorts in the Hot Runner Cable?
To check for a short in a hot runner cable, you would have to touch one of the ohmmeters leads to the male pin or female connection of zone 1. Then, you would make contact with the other lead to each of the other non-related zones at the other end of the cable. You would then repeat this for every zone.
Building Hot Runner Cables and Replacing a Connector
Whether you are building a cable or just replacing a connector, it’s the same process. You’ll wire up one end of the cable to a connector. You then touch one of the ohmmeters leads to the male pin or female connection, and then with the other lead, touch each of the wires until you find the wire that has continuity. You’d then label that wire or go ahead and tighten it to the appropriate zone on your new connector. Repeat this for the remainder of the zones.
How long does it usually take to build a cable the old way? – 30 mins if you’re proficient; maybe over an hour if you’re not.
Using the CableXChecker®
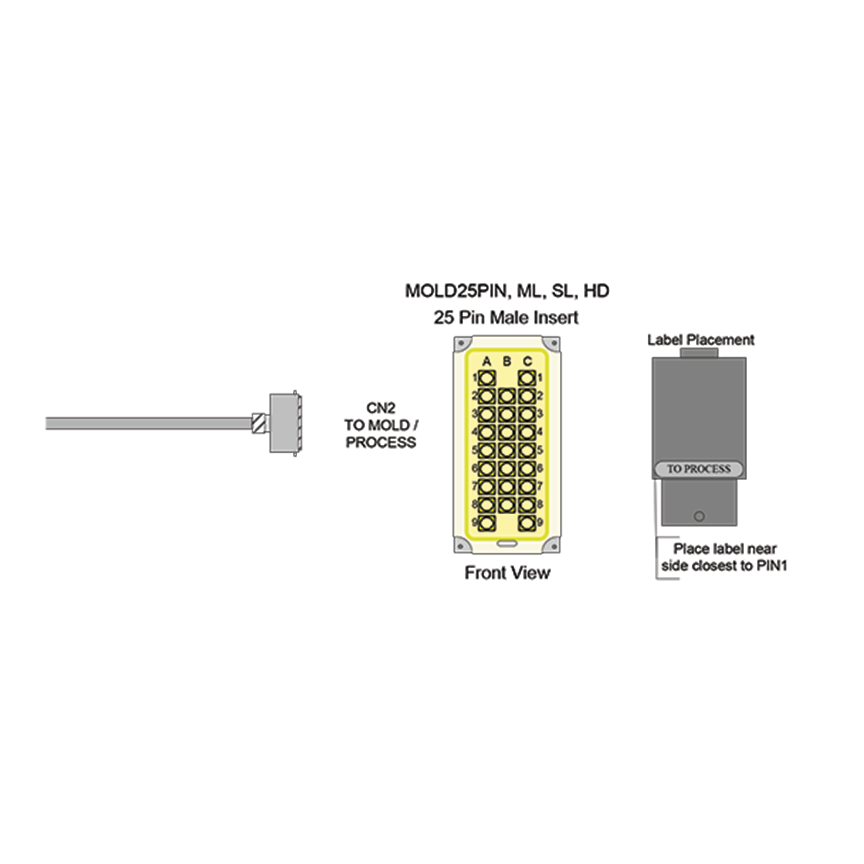
The Cable Checker is custom-built to show your wiring diagram and includes your specified connectors. Plug in your cable and rotate the switch through the zones to verify continuity, find opens, and identify miswires.
Notice! In the video, you’ll notice zone 3 has a miswire with zone 12. The old way, you would only know there was no continuity in that zone. You wouldn’t know if it was an open or a miswire and if a miswire, which zone. First, to rule out that it’s not open due to the wire coming loose. From there, you could inspect for other damages. If there is no damage, you would then use your ohmmeter lead to contact each zone to find where the miswire is located.
How Dangerous is a Short?
The problem is that if someone only checks for continuity, they will not find a short. They will get an ohm reading! What it’s not telling you is that there is also contact with other zones. This is prone to many problems, including:
- A heater may be turned on inadvertently, therefore losing process control.
- You may blow a fuse in the controller.
- You may blow the heater.
- You may blow a t/c if there is a directly shorted heater.
Learn More About Hot Runner Cable Maintenance
Reference: Hot Runner Maintenance Guide